Last Updated: 17-MAR-2016
These were the problems
Tired of paying big $$$ with little insulation in the attic as well as NO VAPOR BARRIER and having the 3 ton A/C system in unconditioned space. Makes no sense to have a air handler with flex duct insulated to R4 trying to stay warm / cool while conditioning the upstairs.
In the winter the system has to run for 7-10 minutes warm up BEFORE I get heat in the rooms. Yes, this is a standard install but I am going to fix it !
Also, the blown in insulation is fine but the wind blows it around to where I have 4 feet in some places and NOTHING in many other places. This will be fixed !
All the duct lines will be replaced with the foil type when the attic work is finished.
So what I did to fix it.
UPDATE: 17-AUG-2011
Done for now. This house has three attics. This was the largest one and I will start on #2 in the fall.
Ended up getting the radiant system from atticfoil.com. The stuff is great ! Reasonable cost. Super strong and very easy to use.
Ventilation - I ended up opening two areas in the top and one on the north and one on the south side. I have a remote temperature sensor and its interesting on how it changes compared to outside. It will cool in the evening but stays 20 or so above the low. Then during the day it gets to the mid to upper 80's on a 95 degree sunny day. I consider this a success ! I will block the vents in the winter to see how it reacts. Humidity wise it stays in the 40's and during the hurricane (tropical storm here) it got as high as 55%
Costs - So far appx. $1800.00 I estimate.
Electric bill - This is the best part ! Met Ed investigated me and refused to charge me the current meter reading. Last July, my bill was $550 and this July it was $300 I had to call and complain. They reviewed everything and said I was right ! Can't wait till I start adding solar panels in 2012 or 2013 !
Was it worth it ! Yes !
(Supplies are for the next attic section)
Air Handler area a bit cleaner
UPDATE: 23-JUL-2011
Started on the cathedral ceiling area. This area was missing insulation in a number of places. Also, fixed some wiring issues.
Also, I was starting to have an issue with my design. Yes, it was working. But, it was getting warmer every day and no longer did the attic cool over night. So, I had to re-think what I was doing. I had isolated the attic from the outside figuring that the HVAC system was leaking enough air to keep it cool..
Also started looking into the radiant barrier systems.
UPDATE: 17-JUL-2011
Made it thru the bad areas. Now over the master bedroom area.
Again continues to make a big difference in comfort in the conditioned areas.
South side almost done
Now comes the fun part. Happy that the builders ran kraft faces insulation down the front.
UPDATE: 09-JUL-2011
Took the week of the 4th off and spent it in the attic. Oh the joy ! But, got a great deal done. Up to the cathedral ceiling area of the master bedroom on the north side. And over the guest bathroom area on the south.
Also, the June Electric bill came and it was $100 lower than 2010 !
UPDATE: 03-JUL-2011
So, now I am up to the areas on both sides of the air handler. "The mess zone" Had to fix the cable system as it as all not labeled and scattered along a large area.
UPDATE: 18/19-JUN-2011
I decided to do the north side first. Removed the blown in crap.. Put in R-21 KRAFT FACED against the sheetrock. Then added 2x6 across the bottom of the trusses and filled in with the blown in stuff. On top of this wnet 1/2 inch plywood for the floor. So, in the end I have a cavity that is 9 inches so that's into the R30+ range. As I passed the 1/3 completed point you could feel the humidity dropping in the rooms below. Amazing difference.
My work area getting bigger
UPDATE: 05-JUN-2011
I did not want another summer of the A/C system having issues.. So, I focused on this 100% Regardless of the temp outside I could work in the attic till noon or so (when it would get to 100+)
Covered the fan with sheetrock (for fire protection) and made a channel so it can draw from the edge vent area
Figured I would just start at one end and work to the other. Do the floor then the roof then move on.
What a mess. The North side.
Again, what a mess. The South side. In this we have can lights, A/C lines, A bathroom fan and more !
UPDATE: 23-JAN-2010
Was up for my 6 month filter change. Did some work installing rafter mates. I really need to get back on this project !
New East wall. Had to fix this entire area for the siding to go on right.
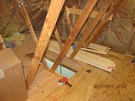
How I added the floor around the trusses
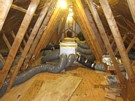
Various views
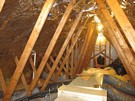
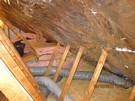
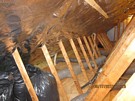
The blown in MESS !! What I am fixing !
The way we secured the wall to the second truss.
Area where the wind blows in over the guest bathroom. Another MESS to fix !
Looking all the way to the West end.
UPDATE: 25-APR-2009
First, I had to increase the depth for the rafter-mate and insulation with 2x2's Put them up with washers as I figure they would crack over time.
Using scraps to make a suction space at the top (Update) when I get going on this I am going to increase this space as I installed a gable fan and will remove the roof fans when the metal roof goes on in a few years.
Putting the 1/2 inch plywood on 2x6's running across the 2x4's with kraft faced insulation facing the living area. Messy job... Removing all the blown in insulation by hand. Then putting in the new kraft faced then the 2x6's across the trusses then back filling the area with blow in insulation. Lots of work BUT !! It will be done right.
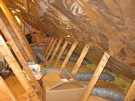
Various views of a big attic with a very big mess to fix !